Print a Single Mailing Label
Customer report CR16 allows you to print multiple mailing labels. However, sometimes it's handy to be able to print just a single mailing label for a customer. Here's how to do it.
1. Find the account you want to print a mailing label for by using one of the following:
People Associated with an Account
2. Regardless of how you get to the account, the detail account screen for that customer will be displayed.
3. Left-click on the  tab and then left-click the
  button.
4. From the drop-down menu, hover your cursor over Address/Folder Labels and then left-click on Print Single Laser Label for this Account.
5. This will display a window for you to select the position of the next unused label to print:
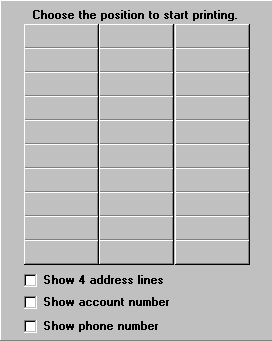

This procedure assumes that you're using individual sheets of peel-off self-adhesive mailing labels arranged in ten rows of three columns per sheet. Some common brands are Avery 6490, Maco ML-3000, and OfficeMax 86100.

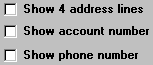
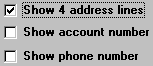
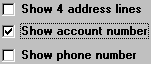
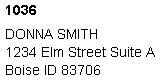
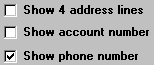
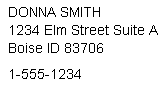
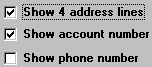
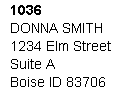
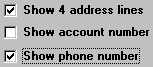
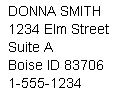
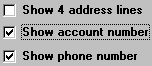
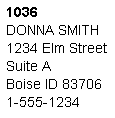
6. There are three check boxes that can also be checked to include different combinations of information on each label. Here are examples of the eight different combinations:


7. Left-click on the position of the next unused label where you want to print.
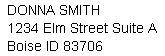
8. This will display the Print Preview window showing where the label will print.
9. Left-click the print button  to print the single label.
10. When it's done printing, left-click the  button to return to the detail account screen for that customer.