Add New Tanks to the System
Account number 0 (zero) is automatically reserved in the system as your company's "Yard Account". When you buy a new tank and want to add it to the system, you first add it to this Yard Account. As a second step, these tanks are then added to individual accounts from this Yard Account using the Add a Tank to an Account function.
From the Lynx Main Menu . . .
1. Left-click on Tanks.
2. A drop down menu will appear.
3. Left-click on Add. Change, Delete Tanks or Equipment.
4. This will display the Add, Change, Delete Tanks or Equipment window ready to add a new tank to the system.
5. Left-click the  button and this window will appear:
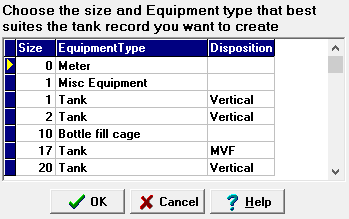

If you don't find the Equipment Type you need on this list, you can add it by using the Add Equipment Types procedure.

6. Left-click on the tank size, type, and disposition you are adding and
then left-click the  button. The one you selected will now
appear in the
button. The one you selected will now
appear in the  text box along with the
size and disposition.
text box along with the
size and disposition.
The system will automatically assign the new tank to "Account 0". You'll notice this on the bottom right side of the screen in the Account # text box.
7. Press the  key to move
to each text box and key in the information about the new tank.
key to move
to each text box and key in the information about the new tank.
8. When you're done adding the tank information, left-click the  button.
9. Then left-click the close button  to return to the Lynx Main
Menu.
to return to the Lynx Main
Menu.
If you're entering multiple tanks (especially where much of the data about them is similar like the same manufacturer, same size, etc.) there is a handy shortcut to assist you with this. See Add Multiple New Tanks to the System for details on how to do this. This is particularly useful when you're first loading all of your tanks into the system or, later, when you've received a load of tanks that need to be added.