Assign a Tax Group to an Account
After your Tax Groups are set up, individual taxes are assigned to each group. Once that's done, the next step is to assign a Tax Group to each of your accounts.
1. Find the account you want to assign the Tax Group to by using one of the following:
People Associated with an Account

If you're going to go through ALL of your accounts, the easiest way is to start with the lowest account number and then advance through the rest of them by left-clicking thebutton.

2. Regardless of how you get to the account, the detail account screen for that customer will be displayed.
3. Left-click the  tab. Then left-click the
  button.
4. This will display the Add, Change, Delete Customers window for that account.
5. Left-click the down arrow  at the right of the Tax Group text box
 which will display a drop-down list of all your Tax Groups.
6. Left-click on the Tax Group you want to be assigned to this account. The individual taxes associated with that Tax Group will be displayed in the grid below.
If you don't see the Tax Group you want to assign to this account, you will have to Add a Tax Group first.
7. After choosing the appropriate Tax Group, select each tax that
applies to this customer by checking the box to the far left corresponding to each individual tax. Like
this: If a tax does not apply, do NOT check the
box.
If a tax does not apply, do NOT check the
box.
8. Left-click the  button and then the
  button.
9. This will display this window:
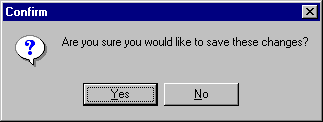
10. If the Tax Group was selected correctly, left-click the  button which will take you back to the account screen. If it was NOT selected correctly,
left-click the
button which will take you back to the account screen. If it was NOT selected correctly,
left-click the  button which will leave you on the
Add, Change, Delete Customers window so that you can try
again.
button which will leave you on the
Add, Change, Delete Customers window so that you can try
again.